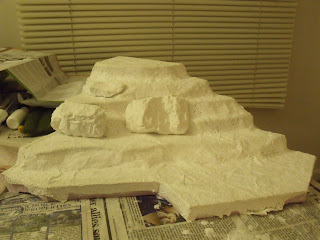
So now that the mountain was covered, it was time to make some rocks! The rock mold only made 3 rocks, each were pretty big (since I'm in Z-scale) but more to come on rocks in Pt3 ;)
Test fit of the 3 rocks from the mold
I glued the rocks on, then sealed the gaps using a lightweight wall spackling. I love using this stuff on my layouts. If you use it and find it hard to spread out, just use a mister bottle and wet it down. It will take longer to dry but when it does it will be much smoother.
A close up of a rock
So now it came time to color the rocks. The kit came with it's own paint but I decided not to use it. It was in limited quantity and I didn't want to run out and not be able to match it later. So I used some acrylic paints I had on hand.
I mixed up a light brown, a dark brown, and a very watered down black. You notice I mixed in bottle caps, this was because it was all I had available, and it allowed me to control how many droplets to water ratio.
The rocks get speckled in the different shades of brown (1/3 area light 1/3 area dark), then the whole surface covered in watered down black.
remember this is what it looked like before paint
Next I had to cover the flat areas with a concentrated dark brown mixture. This is to resemble dirt. This will later be covered in ground foam, but any area that is thin or shins through will show the dark brown. Looks pretty good eh? (white spot on-top of the right rock is the sun BTW, it is actually the same color as the face)
Part 3 will take the mountain to the next level of detailing.


No comments:
Post a Comment